30 January, 2008

Winter flowers and Bree's mittens

It's cold here.
About as cold as it gets in the winter.
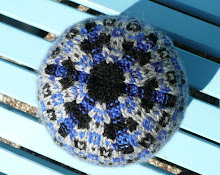
Cold enough that my Texan niece need mittens...


I don't blame her,
I'm cold too!

Det har vært surt og kaldt her i det siste.
Mye "norsk" småregn,
7-8 grader, og i dag blåser det..
I Norge sier de:
Det finnes ikke dårlig vær,
bare dårlige klær.
Det er en sunn og god innstilling!
Jeg har på masse klær,
sitter og strikker ullvotter med neglebit,
men burde kanskje kle på meg et par..

24 January, 2008

Scarf pattern


I finished the scarf.
A easy project for beginners,
so I will post the pattern here.
I used wool yarn,
this one knitted in the UNT
(University of North Texas)
school colors.


“College Patriot Scarf”


With green Cascade 220 wool, CO 40 sts.

Row 1: *K 2, P 2*, rep **
Row 2: Turn, *K 2, P 2*, rep **
Row 3: *K 2, P 2*, rep **
Row 4: *K 2, P 2*, rep **
Row 5: *K 2, P 2*, rep **
Row 6: *K 2, P 2*, rep **
Row 7: *K 2, P 2*, rep **
Row 8: *K 2, P 2*, rep **
Row 9: Knit across all sts
Row 10: Knit knit across all sts

Repeat row 1 through 10.

With white, k 2, p 2, 4 rows,
With green, k 2, p 2, 3 rows,
With white, k2, p 2, 4 rows.

Change to green and
knit across all sts
Next row: knit across all sts

Keep knitting with green,
repeating row 1 through 10,
until the scarf measure 57” (145 cm).

With white, k 2, p 2, 4 rows,
With green, k 2, p 2, 3 rows,
With white, k2, p 2, 4 rows.

Change to green and knit across all sts
Next row: knit across all sts

Keep knitting with green,
repeating row 1 through 10,
one time,
then repeat row 1 through 8,
one time. Cast off.
Weave in the loose strands.
Go UNT!

22 January, 2008

Cabinets

I have been working on my new cabinets.
Somehow I preferred them painted and antiqued,
even though not everybody agreed upon that decision.


Oh well, I threw myself into the unknown,
and started with priming everything.
Second, I painted everything in a cream color,
I did two coats.
After letting it dry overnight,
I mixed my glaze.


1/4 gallon clear glaze,
mixed with "a little bit" very dark brown paint,
all water based, and a little messy...


I started with the doors.
the glaze dries VERY quickly,
so you have to work fast!


Smear the glaze on a small area,
rub it off with a cloth,
leaving the glaze in cracks, corners and uneven areas.


Even on plain flat areas,
it will give a somewhat "dirty" look.
Be careful about overlapping,
you might get unexpected surprises...
I will recommend playing with the technic a little,
before starting a larger project.

You have to be prepared
to except the result as somewhat uncontrollable,
or paint it, and try again..


I loved mine,
have fun testing the technic on yours....

Endelig fant jeg en snekker som kunne bygge skap i "game" rommet vårt.
Han var slettes ikke enig i at jeg ville male dem,
og prøvde å overbevise meg gang etter gang....

Trenden her er tre (gjerne beiset, uff),
lyst, mørkt eller aller helst mellombrunt...
Vel, jeg ville prøve ut noe annet,
først maling, så transparent glasur
mikset med en mørkere maling (slumpet).
Resultat og teknikk er vist over.
Jeg er veldig fornøyd selv, men det er jo en smaksak..
Kan forresten opplyse om at snekkeren likte det veldig godt,
og ville gjerne vite hvordan jeg hadde gått frem....hm..

14 January, 2008

..I got another one!!


And again, I give it on to everybody who visit!
Thank you Janne Kathrine!

A new project

..is on my needles.
Pattern will follow..
just give me a week or so...


The weather was great yesterday,
and also today...


The dogs kept me company outside for a while.
Oh, and did I mention
that knitting needles
can be used for more than knitting?


Have a great new week everybody!

Look what I got!

An award!
From Farmor...
Thank you!!


It makes MY DAY
when you visit my blog!
So this award is given to ya'll..

12 January, 2008

On my needles..

These socks are no fun...
The colors are fine,
but I don't like the yarn that I am using.


This scarf however,
is fun to knit,
mindless knitting.
But I ran out of yarn...


Have a nice Sunday!

09 January, 2008

"Emilia" spring mittens


I knitted these in 2007,
but the pattern has not been posted until now.
They are in two Green colors,
with contrasting Lavender and Blue.
The pattern on Etsy.

05 January, 2008

With a little help from Canada

With a little help from "Arpelia"
I now remember what my mother
taught me several years ago.
She showed me the link to this page.
And this is exactly it!!
I remember now..
Something with six, and start in the middle...
And I will show you how...

Jeg hadde helt glemt ut hvordan mor vevde sokkebånd,

men "Arpelia" fra Canada gav meg en link
med forklaring på engelsk.


I used 6 + 6 strands of wool yarn,
same type yarn, different colors.
My mother often used 2 strands in each color, symmetrical.
She used to tie them to a safety pin,
and then pin it to her apron.
You can also pin it to a pillow or something similar.

Fest en sikkerhetsnål i en pute el. lignende,
knytt på 6 + 6 ulltråder, 2 i hver farge, symmetrisk.


Split them down the middle,
and think of them as two sides.

Del dem på midten, 6 på hver side,
og tenk på dem som høyre og venstre side..


Grab the first strand from the left 6 strands,
and weave across the right 6 strands,
starting by going under the first strand.

Ta den 1ste tråden fra venstre side,
og vev (under, over osv.) mot høyre.

Than grab the first strand from the right side,
and weave across the left strands,
5 of them now, and start by going under.

Ta så den 1ste tråden fra høyre side,
og vev (under, over osv.) mot venstre, kun 5 tråder,
fordi du allerede har vevd med den ene.
Start alltid med å gå under 1ste renningstråd.


You will have to tighten as you go.
I kept the last strands tucked under my pencil,
or secured until the next strand came across.
At that point the secured strand
will be part of the strands going vertical.
Then grab the next green,
from the left side,
and weave across the right side,
including the first green that you started with.

Stram litt for hver gang du har vevd tråden over,
så blir kantene også fine.
La tråden "hvile" oppunder sikkerhetsnåla
til neste omgang.
Forsett på samme måte,
annenhver gang mot høyre og venstre.
Tråden du vevde med fra forrige omgang,
blir lagt til "renningen" i neste.


You will alternate the strands you weave with,
one from each side,
repeating the above technique.
The edges will look nicer if you
tighten a little as you go.


And here is the result.
If you find my explanations hard to understand,
please check the link marked above.
Maybe I will try to add on a few more strands next time..

Ferdig resultat, må nok øve litt mere,
kanskje prøve flere tråder neste gang?
En mer omstendig, engelsk, forklaring
finner du på denne linken.


02 January, 2008

Første par ut i 2008


I just finished these new mittens,
the first pair in 2008.
These are named "Lovebirds",
two swans over a heart..


All my patterns are on Etsy,
and I am so happy to announce that
"Helene" mittens and hat,
are still selling very well!
As I have talked about before,
the money made on "Helene" pattern
gets donated to Cancer research.

Disse vottene har jeg kalt "Lovebirds",
det første paret av flere nye design i 2008.
De minner meg om svanene
i Slettebøvatnet hjemme...
Jeg har brukt 5 farger på disse,
synes det går fortere
når de blir strikket i farge-etapper på denne måten.

01 January, 2008

Mother I need you!

I can not believe I have forgotten
how to weave ribbons...
My mother used to make them,
and I have made several also,
as a kid, a long time ago...

I have tried all morning,
and failed over and over.


I think I started with 5 strands (double yarn),


- or maybe it was 6 strands..?


No, it make more sense with 5... I think...
And I am pretty positive about
that I am suppose to start in the middle..


One strand from each side alternating...
- remember that part for sure...

This is still not right,
I have to go and practice some more...